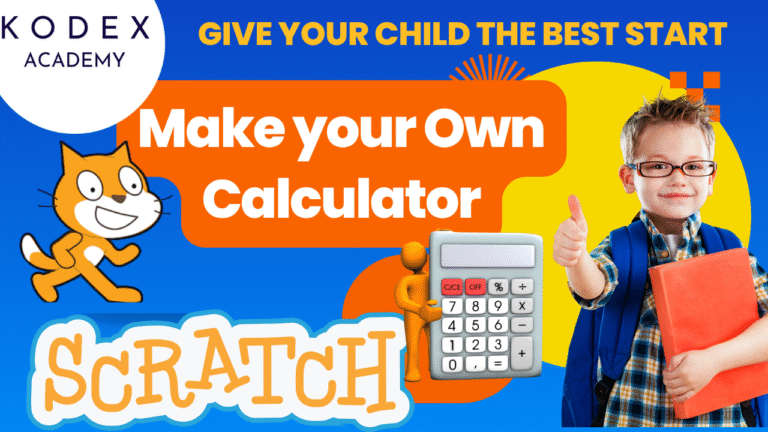
How to create a fully functional and fun calculator using Scratch programming
In this “Scratch 3.0 calculator project,” we’ll build a fully functional calculator that lets users input numbers, select arithmetic operators (add, subtract, multiply, divide), and get real‑time results. This project is ideal for introducing core coding concepts—variables, conditionals, user input, and handling edge cases. It’s also a foundation you can expand into a Scratch math game project.
Game Introduction & Overview
In this Scratch calculator tutorial, we take you from watching a quick demo to building a functional calculator in Scratch—complete with user prompts, number input, and basic arithmetic operations. Whether you’re following Scratch math project for beginners guides or diving into more advanced Scratch 3.0 math game projects, you’ll come away confident in using Scratch to code a simple calculator in Scratch.
From this project, you will learn:
- Why creating a calculator is a fun, hands‑on Scratch 3.0 math project for beginners
- How we follow a Scratch calculator coding tutorial with variables, loops, and conditions
- A preview of building a fully functional calculator with Pico/Terra interaction
Requirements to build Fun Calculator
Prerequisites
- Scratch access (online or desktop, version 3.0)
- Familiarity with core Scratch concepts: sprites, blocks, variables, broadcasts, loops, and conditions
- Computer or tablet with internet access
- A curious mindset and willingness to tinker!
Scratch Concepts You’ll Use
- Ask/Sensing and Wait Blocks: Capturing number inputs into variables like
firstNumber,secondNumber,result,answer - Broadcast/Event Handling & Loops: Relying on messages like “button‑1” or “operator‑plus” and to create an ongoing interaction loop with users
- If/Else Statements: To handle operator choices and logic and determining which operation to perform
- Edge Handling: Preventing divide‑by‑zero errors
By the end, you’ll build a Scratch programming calculator that processes user answers, handles arithmetic, and resets cleanly.
Demo Walk‑through: How Our Calculator Works
Before we start working on the code for our Calculator game, lets understand the different characters and how it works. Let’s start with a demo featuring character Pico (or Terra):
- Click the green flag.
- The character asks:
“What would you like to do: addition (+), subtraction (-), multiplication (*) or division (/)?” - You type (e.g.) addition (+).
- She asks: “Type your first number” → you enter 34.
- Next: “Type your second number” → you enter 4.
- Immediately, Scratch calculates the result and displays it on the stage. The calculator loops back, ready for another operation. Clicking the green flag resets all variables to zero, clearing the slate.
- You can repeat the process for any operator.
- On stopping and restarting, the variables reset to zero, clearing previous values.
This is the behavior we’ll build gradually in code using Scratch blocks.
Objectives learn from this demo of Calculator game
- Understanding the user flow in a Scratch calculator: operator → number inputs → result → loop.
- Recognizing the power of interactive Scratch projects that react to user input.
- Seeing how simplicity in design still leads to an educational, functional tool.
- What the finished calculator looks like in action
Game Code – Step‑by‑Step Guide
1. Setting Up the Scratch Project
A clean setup ensures smooth development—organizing sprites and variables from the start prevents confusion later.
Objectives:
- How to prepare sprites, variables, and the project layout before coding
- Deleting the default sprite and using Pico or Terra for character-based interaction
- Creating clear, descriptive variables to hold user input and operations
- Setting the stage (literally): planning how your character will communicate with users through prompts
Steps:
- Create a new Scratch project (version 3.0).
- Delete the default cat sprite.
- Add a character sprite like Pico or Terra from the Scratch library.
- Variables to create:
answer– holds the user’s typed operator and numbersfirstNumber– stores the first numeric inputsecondNumber– stores the second numeric inputresult– holds the calculated output
2. Coding the Core Calculator Loop
Why a Loop?
Using forever ensures that after calculating one operation, the calculator continues to ask and compute indefinitely—just like a real calculator’s repeatable functions.
Objectives:
- How to build an indefinite loop that continuously runs the calculator
- Adding a
when green flag clickedevent to start the script - Using a
foreverloop to keep the calculator running until stopped - Asking the user what operation they want and storing that response
Blocks Used:
- Events:
when [green flag] clicked - Control:
forever - Sensing:
ask … and wait
when green flag clicked
forever
  ask "What would you like to do: addition, subtraction, multiplication or division?" and wait
  set answer to answer  // captures operator choice
  // We’ll add operator-specific code here (next sections)
end
This loop ensures the character always asks what operation to perform next.
3. Building the Addition Operation
We first build one operation—addition—to understand the process. Once addition works, others follow a similar pattern.
Objectives:
- How to handle the
additioncase: asking numbers, calculating, and displaying result - How to capture input for two numbers
- How to perform calculation with variables
- How to update the
resultvariable
Inside the forever loop, we add a conditional branch:
if <answer = "addition"> then
  ask "Type your first number" and wait
  set firstNumber to answer
  ask "Type your second number" and wait
  set secondNumber to answer
  set result to (firstNumber + secondNumber)
  // The script auto-loops back and asks the next operation
end
This enables the “addition” flow exactly as shown in the video: ask operator → ask two numbers → calculate → show result implicitly via the result variable.
4. Adding Subtraction, Multiplication & Division
With addition working, we replicate for other operations by swapping the operator and math logic.
Objectives:
- How to reuse the same code structure for other operations
- How to use multiple
if-elseblocks to handle different arithmetic operations - Reusing your code structure for subtraction, multiplication, and division
Duplicate the conditional block three times inside your forever loop, replacing the operator and math block appropriately:
else if <answer = "subtraction"> then
  ask "Type your first number" and wait
  set firstNumber to answer
  ask "Type your second number" and wait
  set secondNumber to answer
  set result to (firstNumber - secondNumber)

else if <answer = "multiplication"> then
  ask "Type your first number" and wait
  set firstNumber to answer
  ask "Type your second number" and wait
  set secondNumber to answer
  set result to (firstNumber * secondNumber)

else if <answer = "division"> then
  ask "Type your first number" and wait
  set firstNumber to answer
  ask "Type your second number" and wait
  set secondNumber to answer
  set result to (firstNumber / secondNumber)
This implements Scratch calculator coding tutorial logic for all four basic operations. No divide-by-zero checks were shown in the video, but you can optionally add them.
5. Resetting Variables on Start
If you restart without clearing variables, old data may cause incorrect behavior. Resetting ensures a clean start every time.
Objectives:
- How to initialize calculator variables to zero when the project starts
- Why initialization is crucial in programming loops.
Reset Script
Ensure your variables are reset at the beginning:
when green flag clicked
set firstNumber to 0
set secondNumber to 0
set result to 0
forever
  ask "What would you like to do: addition, subtraction, multiplication or division?" and wait
  set answer to answer
  … [operator blocks] …
end
This matches the video transcript where Terra resets values on each run, avoiding residual data. After clicking the green flag again, everything shows as zero until the first input.
6. Interface Design & User Experience
Text-based replies are functional—but adding visuals and sounds makes your project engaging and fun for kids.
Objectives:
- Tips for improving visual design and engagement
- How to make your calculator feel fun
- How to display prompts and results using visual speech bubbles.
- How to add audio feedback to make interactions lively.
- Why layout and design improve user engagement—crucial for Scratch projects for students.
UI Enhancements:
- Use “say” blocks so Terra shows the question and/or the result on screen
- Add sound effects (like click or beep) whenever the user answers
- Customize the sprite’s appearance or backdrop to resemble a real calculator
- Use costumes to show Terra/Pico expressing excitement or reaction.
- Consider using costumes for Terra to react (e.g., “thinking” vs. “happy”)
These touches turn a functional calculator into a fun game project.
7. Testing & Troubleshooting
Testing is essential—especially with user input; you need confidence that all cases work.
Objectives:
- How to systematically and thoroughly test each operator
- Debugging tips when things don’t work as expected
- Common errors to check: typos in strings, logic flaws, input mismatches.
- How to verify variable resets after restarting the project.
Testing Checklist:
- Addition: try
34 + 4 = 38 - Subtraction: try
10 – 3 = 7 - Multiplication:
9 × 10 = 90 - Division:
12 ÷ 3 = 4 - Resetting: stop and start again—variables should go back to zero
- Handling wrong inputs: what happens if the user types something unexpected?
If something doesn’t work:
- Double‑check your
answer = “operation”strings. - Ensure
ask … and waithappens for every case - Confirm you’re setting variables correctly
- Confirm correct order of prompts and variable assignments.
8. Next Steps & Extensions
Now that you have a working calculator, you can transform it into a game, educational tool, or even more advanced app.
Objectives:
- How to expand beyond basic arithmetic
- Ideas to turn this into a richer Scratch math game project
- Why enhancements help reinforce coding skills.
- How to plan and implement new features logically.
Extension Ideas:
- Error Handling – include checks, like division by zero, non-numeric input
- Decimals & Floats – ask for decimal numbers and use operators
- Negative Numbers – add a plus/minus toggle
- Calculator Modes – include modulo, power, or square-root
- Memory Functions –create
M+,M-,MR, enabling memory operations. - Scientific Functions – incorporate square roots or powers.
- Calculator Quiz Games – turn operations into quizzes with a scoring system
- Themed UIs – let users customize backgrounds, button colors, and fonts.
Each addition reinforces programming fundamentals and gives you creative control to extend beyond simple arithmetic.
What You’ve Built & Learned
- You’ve built a fully functional calculator in Scratch 3.0, driven by user input and loops.
- You learned key Scratch programming concepts: variables, loops, conditions, broadcasts, and sensing.
- You’ve followed a clear Scratch calculator coding tutorial with all four arithmetic operations.
- Techniques to reset, test, debug, and beautify your project.
- You’ve got a strong foundation to expand your project into a game, visualization, or quiz tool.
- Ideas for turning this into an engaging Scratch 3.0 math game project.
This project is an excellent starting point for aspiring coders—perfect for students, educators, and hobbyists. Remix it, share it, and take pride in creating your very own calculator in Scratch!
Final Thoughts
You’ve now created a Scratch programming calculator just like in the video—complete with Terra asking the questions, input prompts, arithmetic operations, and variable resets. You also know how to polish its appearance and expand on its capabilities.
This is a perfect entry-level Scratch coding math tutorial, and a foundation you can share, remix, or improve upon in classroom settings or on the Scratch community.
Happy coding with Kodex Academy!