Introduction to Sensing Blocks in Scratch
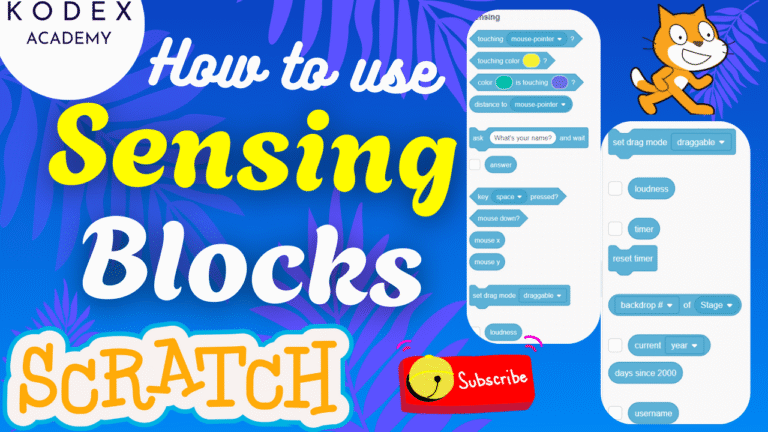
Watch the full tutorial here – How to use Sensing Blocks in Scratch | Scratch Programming and Coding with Examples by Kodex Academy
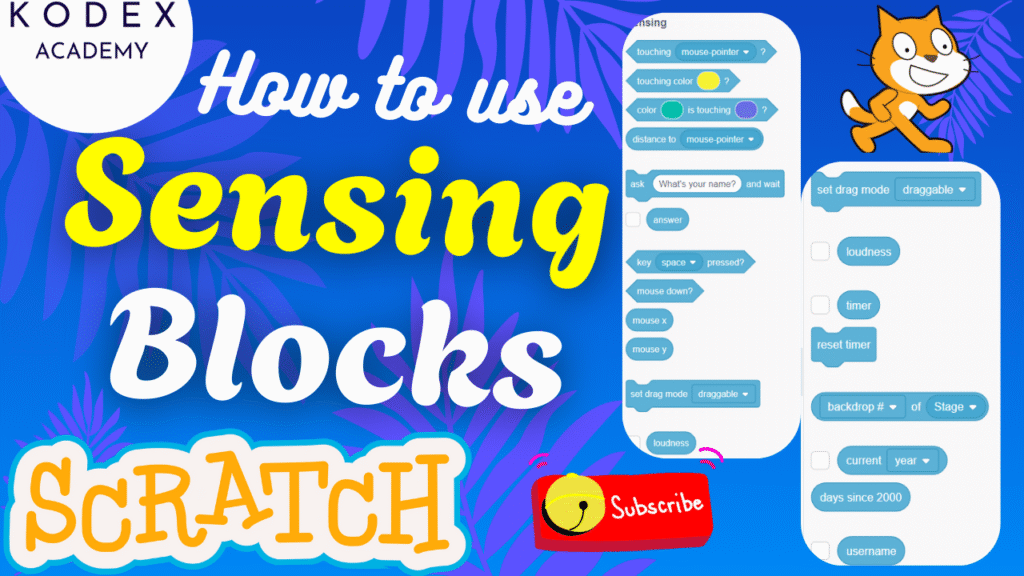
In today’s session, we’re diving deep into one of the most powerful features of Scratch — Sensing Blocks. These blocks allow your projects to interact with the world, detect touches, respond to colors, receive user input, sense sound levels, track mouse and keyboard actions, and even keep time!
Whether you’re building a game, animation, or quiz — sensing blocks help bring your Scratch creations to life by making them truly interactive.
In this live coding tutorial, we’ll walk you through each sensing block with real-time examples, show you how to use them effectively, and share tips for combining them into creative projects.
So if you’re a beginner just starting out with Scratch, or an intermediate coder looking to level up your game design skills — you’re in the right place. Let’s get started and see what your sprites can sense!
What are Sensing Blocks in Scratch?
Sensing blocks are a category of blocks in Scratch (colored cyan) used to detect different types of information: interaction (touch, mouse, keyboard), environment (color, backdrop), input (ask / answer), time, distance, loudness, etc.
Reference Sensing Blocks in Scratch – en.scratch-wiki
In Scratch 3.0, there are 18 sensing blocks:
- 3 Stack blocks (these do something when run, and are not just reporters or booleans):
ask [] and waitreset timerset drag mode [draggable / not draggable]
- 5 Boolean blocks (return true/false):
touching (…)?touching color [color]?color [color1] is touching [color2]?key [key] pressed?mouse down?
- 10 Reporter blocks (return a value, number, or string):
distance to (… )answermouse xmouse yloudnesstimer[variable] of [sprite]current [year / date / month / day / hour / minute / second]days since 2000username
How to Use Sensing Blocks — Scenarios & Code Examples
Below are multiple scenarios with step–by–step instructions, code examples, and screenshots / structure suggestions.
1. Detect Touching (Sprite / Edge / Object)
Scenario: A sprite changes its costume when it touches another sprite or the stage edge.
Blocks to use: if <touching (edge?)> or if <touching [Sprite2]?>
Example Code:
when green flag clicked
forever
  if <touching [edge]?> then
    next costume
    wait (0.2) seconds
  end
end
Enhancement: You can add sounds, change color, or bounce instead.
2. Touching Color, Color is Touching Color
Scenario: If a sprite touches a specific color (e.g. red), then add or subtract score. Or, if a part of sprite’s color touches another object’s color.
Blocks: touching color [#FF0000]?, color [#00FF00] is touching [#0000FF]?
Example Code:
when green flag clicked
set [score v] to (0)
forever
  if <touching color [#FF0000]?> then
    change [score v] by (1)
    wait (0.5) seconds
  else
    // do nothing or reset costume
  end
end
Enhancement: Use different colors for different sprites; dynamically pick colors with color picker. For example, allow user to choose “bad” color and sprite penalises when touching it.
3. Measuring Distance
Scenario: Make a sprite chase another sprite, or avoid when close.
Block: distance to [Sprite2] or distance to (mouse pointer)
Example Code:
when green flag clicked
forever
  if <(distance to [Player] < 50)> then
    say [Too close!] for (1) seconds
  end
end
4. Asking & Waiting for User Input (Ask – Answer)
Scenario: Quiz game asking for user’s name, and then greeting them.
Blocks: ask [What is your name?] and wait, answer
Example Code:
when green flag clicked
ask [What is your name?] and wait
say (join [Hello, ] (answer)) for (2) seconds
Enhancement: Input validation (e.g., ensure not blank), or ask multiple questions in a quiz with scoring.
5. Key Pressed & Mouse Down
Scenario: Control sprite movement via arrow keys; or perform action when mouse is clicked.
Blocks: key [left arrow] pressed?, mouse down?
Example Code:
when green flag clicked
forever
  if <key [right arrow] pressed?> then
    change x by (10)
  end
  if <key [left arrow] pressed?> then
    change x by (-10)
  end
  if <mouse down?> then
    say [Clicked!] for (0.5) seconds
  end
end
6. Mouse X, Mouse Y & Drag Mode
Scenario: Track where the mouse is; or allow dragging sprite.
Blocks: mouse x, mouse y, set drag mode [draggable]
Example Code:
when green flag clicked
set drag mode [draggable]
Or, tracking:
when green flag clicked
forever
  go to x: (mouse x) y: (mouse y)
end
7. Loudness (Microphone Input)
Scenario: Make sprite respond to loudness, e.g. raise its costume size when you shout.
Blocks: loudness
Example Code:
when green flag clicked
forever
  set [size v] to (100 + (loudness))
  // Or use loudness threshold
  if <(loudness) > (30)> then
    say [LOUD!] for (1) seconds
  end
end
8. Timer, Reset Timer
Scenario: In a game, measure time taken; create a countdown or stopwatch.
Blocks: timer, reset timer
Example Code:
when green flag clicked
reset timer
forever
  set [TimeElapsed v] to (timer)
  // display it
  say (join [Seconds: ] (round (timer))) for (0.2) seconds
end
9. Backdrop Sensing
Scenario: Change behavior depending on which backdrop is showing (scene changes).
Blocks: backdrop [name / number]
Example Code:
when green flag clicked
forever
  if <(backdrop #) = (2)> then
    say [Welcome to Level 2] for (2) seconds
  end
  wait until <backdrop # = 1>
end
10. Date, Time & Username
Scenario: Show current year/month/date; personalize with username.
Blocks: current [year], current [month], current [date], username
Example Code:
when green flag clicked
say (join [Today is ] (current [month] :: sensing)) for (2) seconds
say (join [Year: ] (current [year] :: sensing)) for (2) seconds

ask [What is your favorite colour?] and wait
say (join (username) (join [, your favorite colour is ] (answer))) for (2) seconds
Enhancement Features
To make your Scratch projects using sensing blocks more engaging, here are enhancements you can add — along with code snippets:
- Multiple Levels / Scenes
Use backdrop sensing to switch between levels; conditionally trigger when backdrop changes.
when green flag clicked
switch backdrop to [Level1 v]
// Level 1 code
wait until <touching color [#FF0000]?>
switch backdrop to [Level2 v]
// Level 2 code
2. Scoring & Lives System
Combine sensing blocks (touching, color) with variables to track score / lives.
when green flag clicked
set [score v] to (0)
set [lives v] to (3)
forever
  if <touching [Enemy]?> then
    change [lives v] by (-1)
    wait (1) seconds
  end
  if <touching color [#FF0000]?> then
    change [score v] by (5)
    wait (0.5) seconds
  end
  if <(lives) = (0)> then
    say [Game Over] for (2) seconds
    stop [all v]
  end
end
3. Adaptive Difficulty
Use timer and distance blocks to make the game harder as time increases (e.g. enemies move faster, thresholds get stricter).
when green flag clicked
reset timer
forever
  // speed increases as time passes
  set [speed v] to (1 + (timer / 10))
  move (speed) steps
  if <key [space] pressed?> then
    // jump or avoid
  end
end
4. User-Driven Customization
Ask user preferences, username, color choices; use those to adapt game look, sprite color.
when green flag clicked
ask [What is your name?] and wait
set [playerName v] to (answer)
ask [Pick color: red or blue?] and wait
set [favColor v] to (answer)
if <(favColor) = [red]> then
  set pen color to [#FF0000]
else
  set pen color to [#0000FF]
end
say (join [Welcome, ] (playerName)) for (2) seconds
5. Sound / Microphone-Based Interaction
Use loudness to trigger animations; for example, sprite jumps when you shout, or blink when sound crosses threshold.
6. Mouse Tracking / Drag & Drop
Use mouse x / mouse y with go to or set drag mode to allow drag-drop or pointer-following sprite.
Complete Code Example: A Simple Game Putting It All Together
Here’s a full little game idea combining many sensing blocks. Name it Color Dodger:
- Sprites: Player (controlled by arrow keys), Bad Blocks (randomly falling), Background / Backdrop changes for levels
- Features: Score, Lives, Timer, Color detection, Key press, Touching, Ask for player name
// variables: score, lives, level, playerName

when green flag clicked
reset timer
set [score v] to (0)
set [lives v] to (3)
ask [What is your name?] and wait
set [playerName v] to (answer)
say (join [Welcome, ] (playerName)) for (2) seconds
switch backdrop to [Level1 v]
set [level v] to (1)

forever
  // spawn a bad block:
  create clone of [BadBlock v]
  wait (2 - (level * 0.2)) seconds // speed up as level increases

  // check lives
  if <(lives) = (0)> then
    switch backdrop to [GameOver v]
    say [Game Over!] for (3) seconds
    stop [all v]
  end

  // increase level every 30 seconds
  if <(timer) > (30 * level)> then
    change [level v] by (1)
    switch backdrop to (item (level) of [Backdrop1 v Backdrop2 v Backdrop3 v])
    say (join [Level ] (level)) for (2) seconds
  end
end
And in the BadBlock sprite:
when I start as a clone
go to x: (pick random (-200) to (200)) y: (180)
repeat until <touching [Player v]?> or <y position < (-180)>
  change y by (-5)
  wait (0.1) seconds
end
if <touching [Player v]?> then
  change [lives v] by (-1)
  delete this clone
else
  delete this clone
  change [score v] by (1)
end
Enhancements:
- Use
touching colorto avoid certain colored zones - Use headphones / loudness to let player shout to freeze blocks temporarily
- Use
mouse down?to shoot or interact
Conclusion
And that wraps up our deep dive into Sensing Blocks in Scratch! From detecting touch, color, and distance, to capturing keyboard input, tracking mouse movement, using the microphone, and even reacting to the current time and user info — you now have a solid understanding of how sensing blocks make your Scratch projects smart and responsive.
✅ Whether you’re working on a game, an interactive quiz, or a custom animation, sensing blocks give you the power to make your projects come alive by reacting to the world around them.
Here’s a quick recap of what you’ve learned:
- How to detect sprite interactions using “Touching” and “Color Touching” blocks.
- Taking and displaying user input using “Ask and Wait” and “Answer” blocks.
- Tracking keyboard and mouse actions.
- Measuring distance between sprites and objects.
- Using loudness, timers, backdrops, current date/time, and username sensing to create dynamic and personalized experiences.
Call to Action
- Don’t forget to check out the full video tutorial: How to use Sensing Blocks in Scratch | Scratch Programming and Coding with Examples by Kodex Academy
- Like, comment & share the video
- Visit kodexacademy.com
- subscribe to the Kodex Academy YouTube channel for deeper Scratch content.
Happy coding with Kodex Academy! 🚀
Learn More with Kodex Academy
At Kodex Academy, we’re passionate about helping students learn coding in creative ways. This project teaches more than Scratch—it empowers young minds to build tools that work in the real world.
Explore more:
Stay updated with new content, free tutorials, and coding challenges!
- 🌐 Website: https://kodexacademy.com
- 🌐 Website: https://games.kodexacademy.com
- 💬 WhatsApp Channel: Join Now
- 💼 LinkedIn: Kodex Academy
- 📸 Instagram: @kodex_academy
- 𝕏 Twitter: @Kodex_Academy
- 📢 Telegram: Join Our Channel
- 🔗 Patreon: patreon.com/KodexAcademy
Further Reading & Links
- Scratch Wiki Motion Blocks: https://en.scratch-wiki.info/wiki/Motion_Blocks
- Scratch Programming for Beginners: https://scratch.mit.edu/projects/editor
- Scratch Animation Guide: https://en.scratch-wiki.info/wiki/Animating

