How to Make a Snowman Chase Snowflakes – Step by Step Scratch Game Tutorial
Scratch Game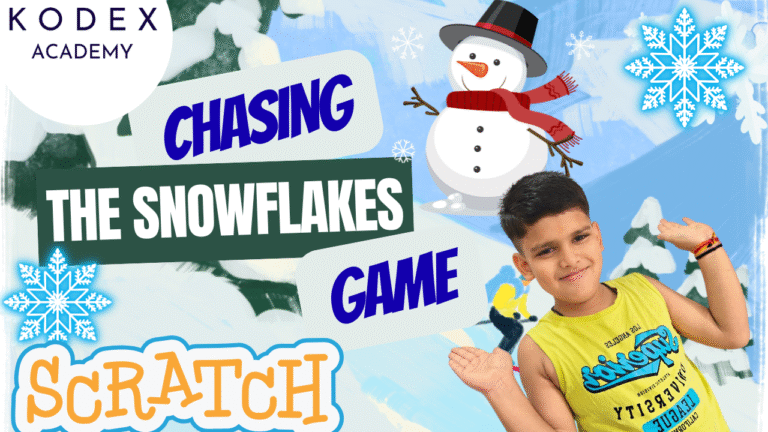
Introduction: Why Make a Snowman Chase Snowflakes
Welcome to this interactive Scratch game tutorial! If you've ever wanted to learn Scratch coding, build fun Scratch projects, and develop a Scratch game idea, there's no better place to start than a charming winter game featuring a snowman chasing snowflakes. Creating a Scratch winter game with a snowman chasing snowflakes is more than just fun—it's both a creative adventure and a powerful learning experience. Here's why it's such an ideal project:
- This Scratch snowman chase tutorial teaches collision detection and variable scoring.
- Immediate visual payoff – kids instantly see movement, scoring, and feedback.
- Foundational skills – covers Motion, Event, Control, Variable, and Sensing blocks.
- Scalable and remixable – start small, then add clones, animations, sound, and snowbanks.
- Engaging theme – a cute snowman and falling snowflakes capture students' imaginations.
- Prepares you for full-fledged Scratch game development.
Whether you're brand-new to Scratch coding or building a portfolio of interactive Scratch games, this tutorial gives you something polished to show off—and remix.
👉 Watch the Full YouTube Tutorial Here:
Chasing the Snowflakes by Snowman – Step by step Scratch Game Tutorial
Project Overview: Step-by-Step
Here's a high-level roadmap:
- Backdrop & sprites – set the scene.
- Snowman movement – responsive arrow key control.
- Snowflake animation – random gliding and resizing.
- Scoring mechanics – variables, sounds, and collision detection.
- Game structure & reset – clear start state and game loop.
- Enhancements – cloning effects, variable speeds, pen drawings, and more.
1. Scratch Game Tutorial: Getting Started with Backdrop & Sprite Selection
Open Scratch and create a new project.
a. Scratch Stage Cleaning: Clear Canvas for Snowman Game
- • Remove the default cat sprite: click the trash icon.
b. Scratch Winter Backdrop Tutorial: Add Festive Scene for Game
- Click Choose a Backdrop → Search "winter"
- Select a snowy background that matches your theme.
c. Scratch Sprite Addition: Select Snowman & Snowflake for Chase Game
- Click Choose a Sprite → Search "snowman" – select it.
- Click Choose a Sprite → Search "snowflake" – add it to the Stage.
At this point, you have a snowman and an oversized snowflake—perfect as raw assets for development.
2. Scratch Snowflake Sprite Prep: Customize for Gliding Animation
a. Scratch Color Adjustment: Make Snowflake Visible in Winter Game
To make the snowflake visible against the winter sky:
- Select the Snowflake sprite.
- Enter the Costumes tab and use the Color Effect tool.
- Lighten or brighten until it stands out well.
b. Scratch Sprite Resizing: Scale Snowflake for Perfect Chase Dynamics
Reduce the snowflake size to 30%:
- • In the sprite toolbar, set Size → 30%.
These tweaks turn an oversized, lost snowflake into a clear, collectible object.
3. Scratch Snowman Movement Coding: Arrow Key Controls for Chase Tutorial
The snowman needs to move up, down, left, and right using arrow keys.
Add these code blocks:
// Move right
when [right arrow] key pressed
change x by 10

// Move left
when [left arrow] key pressed
change x by -10

// Move up
when [up arrow] key pressed
change y by 30

// Move down
when [down arrow] key pressed
change y by -30
Tip: Adjust movement amounts (10 and 30) for faster/slower movement; keep consistent with your game's feel.
4. Scratch Snowflake Animation Tutorial: Glide & Fall Effects with Code
Let the snowflake glide randomly across the screen for unpredictability:
when green flag clicked
go to x: -187 y: 66   // starting position

when green flag clicked
forever
  glide 1 sec to random position
This script gives your snowflake unpredictable movement, making the game challenging and engaging.
5. Scratch Scoring System Tutorial: Variables, Sensing & Sound for Game Points
a. Scratch Variable Creation: Set Up Coins Counter for Snowflake Collection
- • Go to Variables → Make a Variable → name it `coins`
b. Scratch Collision Detection: Sense Touching for Snowman Snowflake Catch
when green flag clicked
forever
  if  then
    play sound [coin] until done
    change [coins] by 1
    wait 1 second
end
This block checks collisions continuously and updates the score accordingly.
c. Scratch Game State Initialization: Reset Variables & Start Snow Chase
Add this to ensure starting conditions are correct:
when green flag clicked
go to x: 0 y: 0
set [coins] to 0
Now your game starts clean with a fresh scoreboard and centered snowman.
6. Scratch Full Code Overlay: Complete Snowman Snowflake Game Script
Snowman Game Script
when [right arrow] key pressed → change x by 10
when [left arrow] key pressed → change x by -10
when [up arrow] key pressed → change y by 30
when [down arrow] key pressed → change y by -30

when green flag clicked
go to x: 0 y: 0
set [coins] to 0
Snowflake Game Script
when green flag clicked
go to x: -187 y: 66

when green flag clicked
forever
  glide 1 sec to random position

when green flag clicked
forever
  if  then
    play sound [coin] until done
    change [coins] by 1
    wait 1 sec
7. Scratch Game Testing Tutorial: Run & Debug Snowman Chase with Green Flag
Click green flag to start. Use arrow keys to maneuver the snowman. Each time you catch the snowflake, you'll hear a coin sound and see the score increase. Try catching it fast before it glides away!
Scratch Game Enhancements Tutorial: Level Up Snowman Chase with Remix Ideas
Take your game to the next level with these extensions:
1. Scratch Cloning Tutorial: Multiple Snowflakes for Dynamic Winter Chase
Use the Clone blocks for a snowfall effect:
when green flag clicked
repeat 5  // create 5 snowflakes
  create clone of [myself]

when I start as a clone
  set size to (random 20–40)
  go to random position
  forever
    glide (random .5–2) secs to random position
    if  then
      change [coins] by 1
      play sound [coin]
      delete this clone
2. Scratch Random Effects: Vary Snowflake Sizes & Speed in Game
Add realism by scattering flakes of various sizes:
set size to (random 20 to 50)
glide (random .5 to 2) secs to random target
3. Scratch Pen Extension Tutorial: Draw Snowflake Art Trails in Chase Game
Want your snowflakes to leave beautiful icy trails as they float? Turn on the Pen extension and add this tiny code to the snowflake sprite:
when green flag clicked
erase all
pen down
set pen color to [#a5f2ff]
set pen size to (3)
forever
  glide (1) secs to x: (pick random -240 to 240) y: (pick random -180 to 180)
Now every snowflake paints a sparkling trail!
4. Scratch Snowfall Effect Tutorial: Accumulate Snow with Particle System
Make snow pile up at the bottom like a real snowstorm! Add a new sprite (a thin white rectangle) at the bottom and use this code inside the snowflake:
when I start as a clone
forever
  if <(y position) < [-160]> then
    change [color v] effect by (25)   :: detect white snow pile
    if  then
      stop [this script v]
      change y by (5)   :: stick to pile
      set [ghost v] effect to (50)
Watch the snow slowly build up as you catch snowflakes! Perfect for turning this into a real winter wonderland.
5. Scratch Sound Integration: Add Winter Music & Effects to Snowman Game
Make your game feel magical with real winter sounds!
- "fairydust" → extra sparkle when catching!
- Click the Sounds tab on the snowflake sprite
- "windchime" → magical catch sound
- "blizzard" or "wind" → background ambience
- "fairydust" → extra sparkle when catching!
when this sprite clicked
play sound [windchime v] until done

when green flag clicked
forever
  play sound [blizzard v]   :: loop softly in background
Now your snowman chase feels like a real snowy adventure!
6. Scratch Timer Tutorial: Add Score Targets & Time Limits to Snowflake Chase
Bring a finish line:
- • Time-limited collection (30-second timer)
- • Target score (first to 20 coins wins)
Use loops, timing blocks, and "broadcast" to manage win/lose states.
when green flag clicked
set [timer v] to [60]        :: 60-second game
set [target v] to [20]       :: need 20 snowflakes
show variable [timer v]
forever
  wait (1) secs
  change [timer v] by (-1)
  if <(timer) = [0]> then
    if <(coins) > [target]> then
      say [You Win! ❄️] for (3) secs
    else
      say [Time's Up! Try Again!] for (3) secs
    end
    stop [all v]
  end
Now kids race against the clock to catch 20 snowflakes—instant replay value!
Scratch Game Tutorial: Step Summary
Getting Started with Backdrop & Sprite Selection
Clean stage, add winter backdrop, add snowman and snowflake sprites.
Prepare the Snowflake Sprite
Adjust color for visibility, resize to 30%.
Scratch Snowman Movement Coding
Use arrow keys for up/down/left/right motion.
Scratch Snowflake Animation Tutorial
Glide randomly across screen.
Add Scoring with Variables, Sensing & Sound
Create 'coins' variable, detect touching snowflake, play sound, update score.
Run & Debug Snowman Chase
Green flag to start, arrow keys to chase.
Level Up: Enhancements & Remix Ideas
Add cloning, random sizes/speeds, Pen for art, sounds, timer.
FAQ: Frequently Asked Question
| Question | Answer |
|---|---|
| How to add a snowman in Scratch? | Search "snowman" in Choose a Sprite → add it → resize to 100% for perfect winter chase game size. |
| How to make snowflakes move randomly in Scratch? | Use "glide 2 secs to x: (pick random -240 to 240) y: (pick random -180 to 180)" in a forever loop. |
| How to add scoring in Scratch games? | Create "coins" variable, change by 1 on paddle bounce. |
| What is cloning in Scratch for multiple snowflakes? | "When green flag clicked" → repeat 5 → create clone of snowflake → each clone moves independently. |
| Best age for this Scratch snowman game tutorial? | Ages 6-12: Simple movement for young kids, cloning/enhancements for older ones. |
| How to add sounds to Scratch snowflake collection? | Play "coin" or "pop" sound until done when touching the snowflake. |
| How to remix this Scratch winter game? | Add timer, more obstacles, or Pen for snow trails—share your version in our YouTube comments! |
Conclusion
To follow along visually and ensure step-by-step comprehension, don't miss the full walkthrough:
You've just built—or will build—a polished, engaging Scratch snowflake game with a snowman as the main character. From beginner-friendly movement to scoring logic and polish tips, this guide covers:
- • Basic to intermediate Scratch coding
- • Block-based game logic and variables
- • Creative remixing for winter-themed animations
Take the coding further:
- • Create snowfall using cloning and pen drawings
- • Add enemies or moving obstacles
- • Introduce win/lose conditions and multiple levels
Share your work using your YouTube link and join Scratch studios for community feedback.
🎮 Ready to Build Your Own Snowman Chase Game?
Creating a snowman chase snowflakes game in Scratch is an excellent way to learn fundamental game development concepts. Whether you're a beginner or looking to teach kids programming, this project covers essential skills like motion, collision detection, scoring systems, and game state management.
If you enjoyed this tutorial, be sure to share it with fellow educators or parents who want their kids to learn Scratch programming through fun, interactive games.
- Don't forget to check out the full video tutorial by Kodex Academy here: 🎥 Watch the full Chasing the Snowflakes by Snowman Tutorial
- Like, comment & share the video
- Visit kodexacademy.com
- Subscribe to the Kodex Academy YouTube channel for deeper Scratch content.
Happy coding with Kodex Academy! ❄️
Share This Tutorial
Help other kids learn Scratch game development! Share this tutorial with friends and family.